Delta 43-460 User Manual Page 6
- Page / 16
- Table of contents
- BOOKMARKS
- 2-Speed Heavy-Duty 1
- Wood Shaper 1
- GENERAL SAFETY RULES 2
- SAVE THESE INSTRUCTIONS 4
- FOREWORD 5
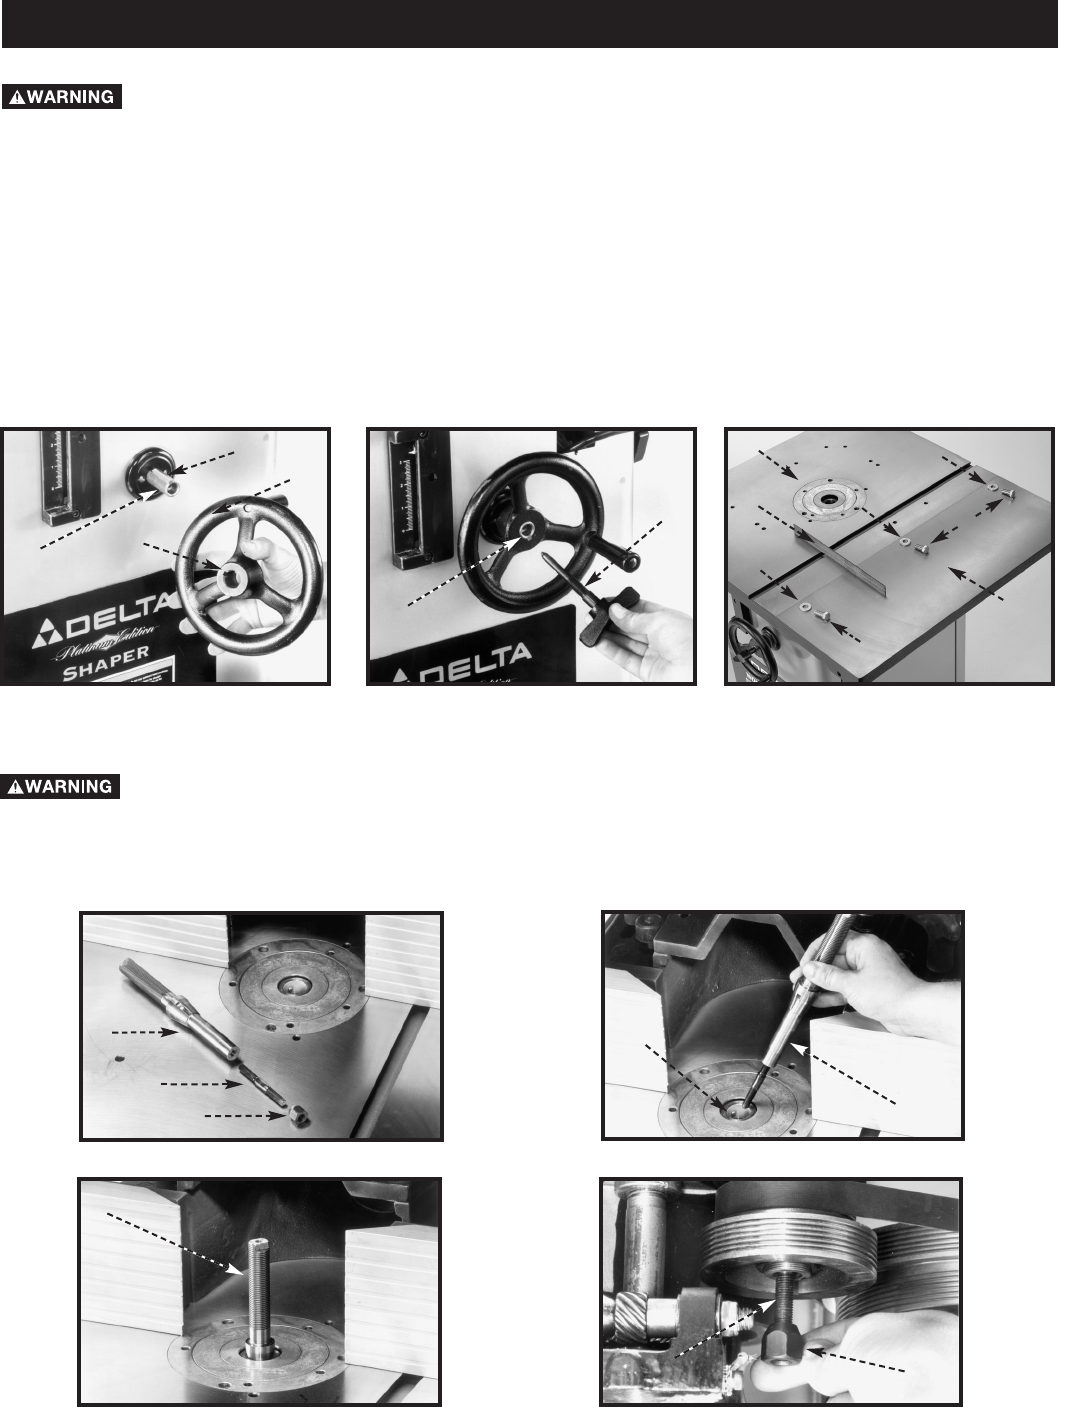
- ASSEMBLY 6
- ATTACHING TABLE INSERTS 7
- ATTACHING SPINDLE GUARD 7
- RAISING AND LOWERING SPINDLE 8
- OPERATIONS 9
- END SHAPING 10
- CROSS GRAIN SHAPING 10
- SHAPING NARROW MATERIAL 10
- STARTING PIN 11
- REPLACING SPINDLE CARTRIDGE 11
- ACCESSORIES 12
- • DELTA) 16
- • DELTA SERVICE CENTERS 16
Related products and manuals for Equipment Delta 43-460


 (76 pages)
(12 pages)
(54 pages)
(76 pages)
(12 pages)
(54 pages)
© 2020, manymanuals.com. All rights reserved. | 1.400 s |
 Manymanuals.com
 Manymanuals.de
 Manymanuals.fr
 Manymanuals.it
 Manymanuals.pl
 Manymanuals.cz
 Manymanuals.es
 Manymanuals-pt.com
Comments to this Manuals