Delta 46-745 Instruction Manual Page 18
- Page / 24
- Table of contents
- BOOKMARKS
- 16” Variable Speed 1
- Wood Lathe 1
- GENERAL SAFETY RULES 2
- 03-17-03 3
- SAVE THESE INSTRUCTIONS 4
- POWER CONNECTIONS 5
- MOTOR SPECIFICATIONS 5
- GROUNDING INSTRUCTIONS 5
- EXTENSION CORDS 6
- FUNCTIONAL DESCRIPTION 7
- ASSEMBLY 8
- ATTACHING LEG INSERTS 9
- HEADSTOCK SPUR CENTER 9
- STARTING AND STOPPING THE 11
- LOCKING SWITCH IN THE 11
- “OFF” POSITION 11
- ACTIVATING THE SPINDLE 11
- CHANGING SPEED RANGES 12
- OPERATION 13
- MOUNTING THE WORK 14
- TOOL REST POSITION 14
- ROUGHING A CYLINDER 15
- POSITION OF HANDS 15
- SMOOTHING A CYLINDER 16
- USING THE PARTING TOOL 16
- SQUARING AN END 16
- CUTTING A SHOULDER 17
- CUTTING SMALL BEADS 17
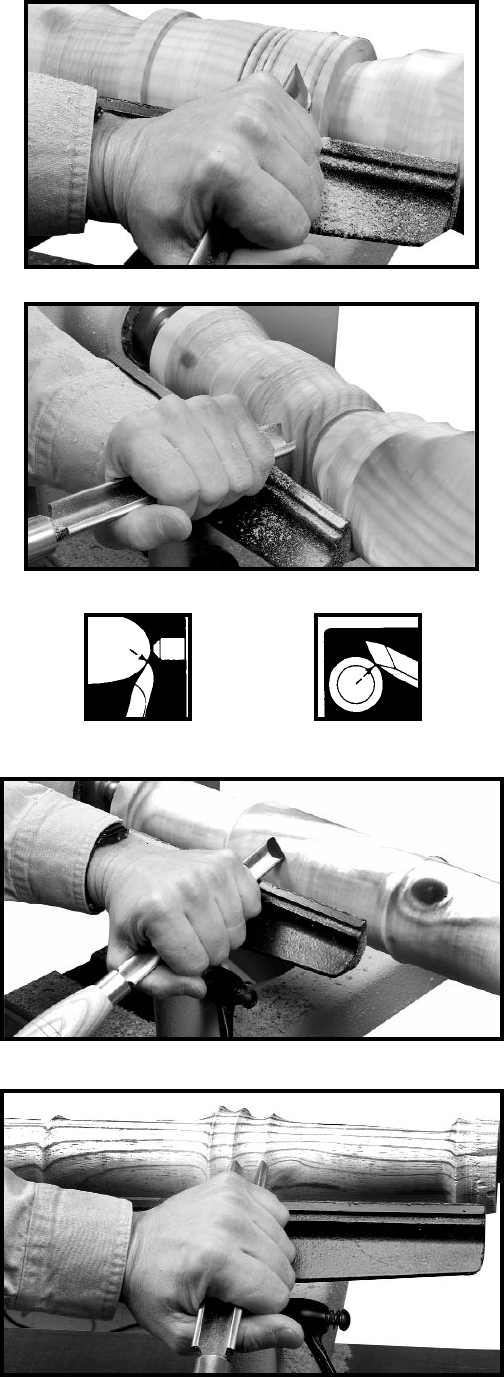
- VEE GROOVES 18
- LONG CUTS 18
- COVE CUTS 18
- SQUARE SECTIONS 19
- FACEPLATE TURNING 20
- MOUNTING WORK TO FACEPLATE 20
- OUTBOARD TURNING 20
- MAINTENANCE 21
- LUBRICATION 22
- ACCESSORIES 23
- • DELTA SERVICE CENTERS 24
- • DELTA) 24
Related products and manuals for Lathes Delta 46-745
 (24 pages)

 (64 pages)
(24 pages)
(64 pages)
(24 pages)
 (8 pages)
(23 pages)
(2 pages)
(8 pages)
(23 pages)
(2 pages)
© 2020, manymanuals.com. All rights reserved. | 0.631 s |
 Manymanuals.com
 Manymanuals.de
 Manymanuals.fr
 Manymanuals.it
 Manymanuals.pl
 Manymanuals.cz
 Manymanuals.es
 Manymanuals-pt.com
Comments to this Manuals