Delta 561-MPU-DST Instruction Manual
Browse online or download Instruction Manual for Sanitary ware Delta 561-MPU-DST. Delta 561-MPU-DST Instructions / Assembly User Manual
- Page / 12
- Table of contents
- BOOKMARKS
Summary of Contents
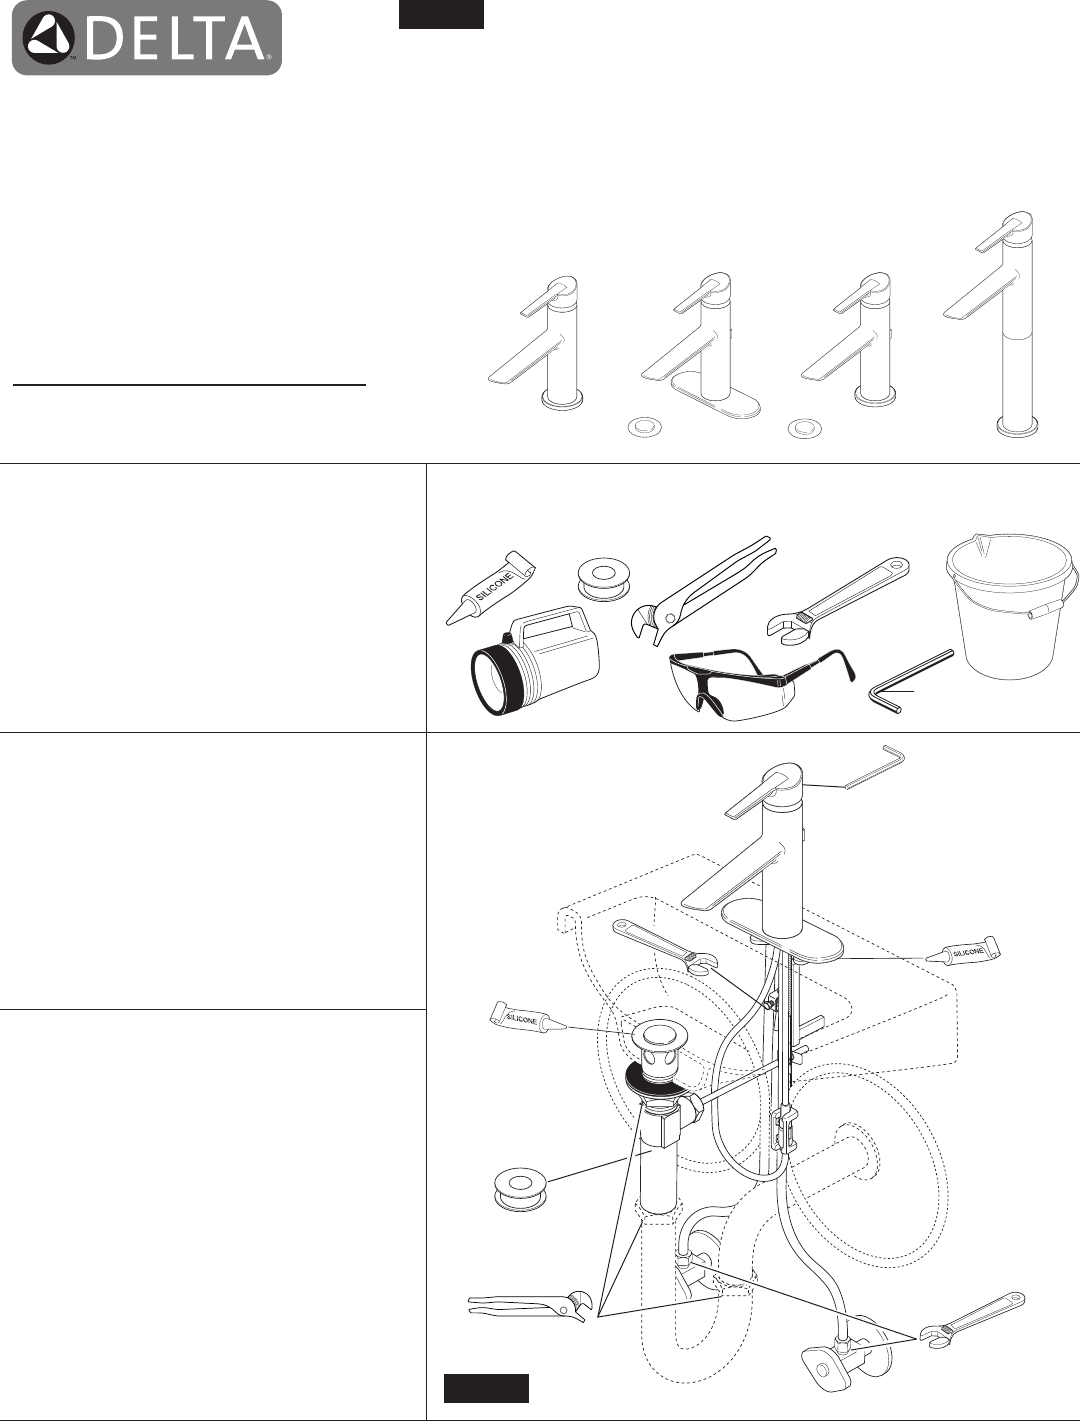
16/23/14 Rev. AModels/Modelos/Modèles561-DST & 761-DSTSeries/Series/SeriaCompel™Para instalación fácil de su llave Delta usted necesitará:•LEE
1078054 Rev. ARP73000 Valve AssemblyEnsamble de la válvulaSoupapeRP50952Plastic SleevesMangas PlásticasManchons en plastiqueRP51243GasketsEmpaques Jo
If leak persists–SHUT OFF WATER SUPPLIES. Replace valve cartridge (4). When reinstalling parts, make sure bonnet nut (5) is tightened securely with a
1278054 Rev. ANotes / Notas / Notes
278054 Rev. A© 2014 Masco Corporación de IndianaPiezas y acabadoTodas las piezas (excepto las piezas electrónicas y las pilas) y los acabados de esta
78054 Rev. A31A.A.A. Slide escutcheon (1) and 3 hole gasket (2) up over tubes and mounting stud. Slide tubes down through mounting hole and position
2A. Conexiones a la Línea de Agua Asegúrese que todos los accesorios y las conexiones finales estén libres de residuos. Los accesorios (1) son de co
578054 Rev. AEnsure cut is straight.Do not install sleeve upside down.Do not use RP51243 gas-ket (1) supplied with PEX tubing or brass ferrule (2)
3 4 Connect outlet tube (1) to spout tube (2) with supplied clip (3). Pull on hose (1) to ensure it is firmly attached.Place a bucket below the outlet
78054 Rev. A75A.B.D.E.A. Remove stopper (1), brass nut & washer (2), black gasket (3) and tail piece (4).B. Apply silicone to underside of flange
878054 Rev. A5A. Remove stopper (1) and flange (2).B. Screw nut (1) all the way down. Push washer (2) and gasket (3) down.C. Remove tailpiece (1) fro
61Turn on hot and cold water supplies (1) and check all connections at arrows for leaks. Retighten if necessary, but do not overtighten.Abra los sumin
Related products and manuals for Sanitary ware Delta 561-MPU-DST


 (12 pages)
 (6 pages)
© 2020, manymanuals.com. All rights reserved. | 1.129 s |
 Manymanuals.com
 Manymanuals.de
 Manymanuals.fr
 Manymanuals.it
 Manymanuals.pl
 Manymanuals.cz
 Manymanuals.es
 Manymanuals-pt.com
Comments to this Manuals